How to install Windows 2008 R2 on VMware ESX
1. Log to your ESX server using your vSphere or your vCenter
1.1 Right click on the ESX Host, and click on “New Virtual Machine”
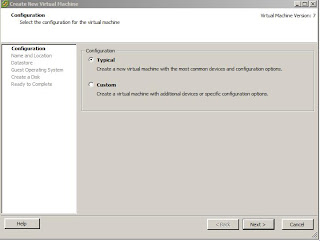
1.2
Select “Typical”
and click [Next>]
1.3
Give it Name, for example: “Windows 2008 R2”, and click [Next>]
1.4
Select the [Datastore],
where you want your VM to be installed, and click [Next>]
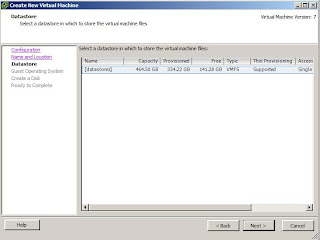
Note: You
can see I have a single [Datastore]
1.5 Chose which template you need, click on [Next>]
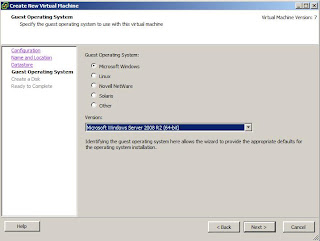 Note: by
default Vmware has pre-selected “Microsoft Windows 2008 R2
(64-bit)” This is what we are installing.
Note: by
default Vmware has pre-selected “Microsoft Windows 2008 R2
(64-bit)” This is what we are installing.
1.6 Size the disk for your VM, I am going to give my
VM 80GB disk and click [Next>]
1.7 Tick the box “Edit the
virtual machine settings before completion” and click [Continue]
1.8 Give as much memory as you need to your Windows 2008 VM
Note: I am
only going to give it a 4GB.
1.9 Click on [Options], then on “Boot Options”, add 15
seconds to “Power On Boot Delay”, tick
the box “Force BIOS Setup” and click [Finish]
1.10 Once your VM is crated, right click on it and
click on “Power”à “Power
On”
Note:
Once your machine has been powered on, it will display the BIOS screen.
You need to select the “Boot” option and make the CDROM the
first boot option.
1.11 At the top of your screen, just below the menu,
click on the “CDROM” icon
1.12 Click on “Connect
to ISO image on local disk…”
1.13 Select the Windows 2008 R2 ISO image and click [Open]
1.14 Go back to the BIOS scree, press <F10>
1.15 You will see the screen below, just hit [ENTER]
1.16 Your Virtual Machine will boot off the Windows
2008 R2 ISO, see below
1.17 The Windows installation will begin see the
screen “Start Windows”
1.18 Choose the Language. I am in UK, so I chose “English (United Kingdom)”
1.19 Click on [Install
Now]
1.20
Chose which version of Windows 2008 R2 you want to install and click [Next]
1.21 Accept the License
terms and click [Next]
1.22 Select “Custom
(Advanced)”
1.23 Click on [Next]
1.24 Windows will start copying files to your Virtual
Machine
1.25. Note:
Once Windows finishes copying files, it will reboot your VM a couple of times
1.26 Once Windows has finished the installation, it
will prompt you to change the Administrator’s password. Click [OK]
1.27 Choose a new Password and click on the Blue Arrow
1.28 Click on [OK]
Your Windows 2008 VM will be logged on as
Administrator and your installation is complete.
Depending on how you will use your new
Windows 2008 server, there are many things you need to do to get it fully
setup.
Here
is a short list
1.
Set a name
2.
Set an IP
3.
Join it to a domain, if you required
I hope you enjoyed. I will be covering a Linux installation
(Redhat) later.
By Renato de Oliveira


