Showing posts with label Windows 2008. Show all posts

Friday, 29 March 2013

Windows 2008 post install tasks (Continuation)


Windows 2008 post install tasks
Add The License key
1.       The first thing to do is to add the license key to your server
a.       Click on “Change product key”


b.       Type the key within the “Product Key” field. And click [Next>]


c.       Windows will contact Microsoft and verify your key
 
Set an IP address for your Windows 2008
1.    Click on [Start], then right click on “Network”, and click on “Properties”
2.    The screen below will pop up, click on “Change adaptor settings”
3.    You will see the screen below, right click on your Network Adaptor, and click on “Properties”


4.    The properties screen will be displayed, select “Internet Protocol Version 4 (TCP/IPv4) and click on [Properties]


5.    Type in the IP address, Subnet mask, gateway and DNS, then click [OK]


Note: I used IP address "192.168.1.72" for this server, you need to use a free IP address on your network. This is a class C IP and its mask is "255.255.255.0". The default gateway is the IP for your router. If you have a DNS server on your network typ in its IP, otherwise use the DNS provided by your ISP.
 
Join a 2008 server to a Domain
 
1.       Click on [Start], right click on “Computer”, click on “Properties”
 

2.       The screen below will be displayed, click on “Change Settings”.
 
3.       The screen below will be displayed, click on “Change Settings”.


4.       The screen below will pop up, then click on [Change]
 
 5.       Click on “Domain:”, then type in the name of your Domain, then click [OK]


6.       Windows will request a user name with admin rights to join the server to the domain.
             Type in the user name and the password for the user with admin rights, the click [OK]
 
7.       The “Welcome” Message will be displayed, click on [OK]
 
8.       Click on [Restart Now]
Note: once the server is joined to the domain, windows needs to restart.

 Now you have your Windows server, initially configured. We need to decide what service it will be hosting.
 
Once this process is finished, your server will be licensed and ready to be used.
by Renato

How to Install VMware Tools onto Windows 2008 VM server


How to Install VMware Tools onto Windows 2008 VM server


1.       Log to your Windows 2008 server (the one you just installed)

2.       If your server is a VM, you need to install the VMware tools.

a.       Right click on the server name, click on “Guest”, then on “Install/Upgrade VMware tools”


b.       The windows below will popup, just click [OK]


c.       Windows will mount VMware tools as a CDrom drive and auto start, see below.
                         Click on “Run setup.exe”


d.       VMware is preparing to install
 
e.       When the screen below pops up, click [Next>]
 
f.       Choose “Typical” and click [Next>]


g.       Click on [Install]


h.       Click on [Finish]
 

i.       Click on [Yes] Windows will reboot and the drivers for your NIC will be installed


Once Windows has rebooted, the drivers will be installed, then you can configure the network.
 
By Renato Oliveira
 

Monday, 25 March 2013

Netwok design, install and configuration

Netwok design, install and configuration

I have decided to share with you my experiences and I will show you most things about networks.

I am going to start from scratch and write posts on how to:
  • How to Install Windows 2008
    • Setup network
    • Active Directory
    • DNS
    • DHCP
    • etc
  • How to Install Redhat 6
    • Setup the Network
    • Integrate Linux to Active directory
    • Setup most config files under /etc
    • NFS
    • SAMBA
  • How to Set up Citrix
  • How to Setup Juniper SRX Security gateway
  • How to Setup NetApp Ontap 8.1

I am going to give you ideas on how to plan your AD, your DNS naming, your IP address scheme, how to position your clients on the network.
I will discuss DMZ, VLANs, Security, SSH, Locking down Linux.

I will have recommendations on security, patch management, for Windows. Design considerations for your network.
Resiliency and redundancy will be discussed also.

If you want to benefit from this blog, just keep visiting it, it will be your stop shop for most Network systems.

My plan is to every day write a new post about some topic.

I have already few posts and I will make the link between each post, so you can easily follow up.

If you have suggestions, please let me know I will try my best to accomodate your suggestions and also write about them.

I hope you will enjoy and learn all this exciting stuff related to IT.

Many thanks

Renato Oliveira

Sunday, 24 March 2013

Installing a virtual Windows 2008 R2 (ESX)

How to install Windows 2008 R2 on VMware ESX
1. Log to your ESX server using your vSphere or your vCenter

1.1 Right click on the ESX Host, and click on “New Virtual Machine”

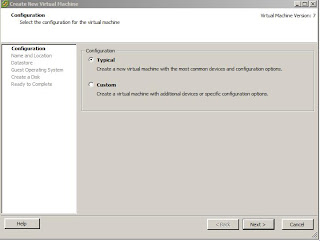
1.2   Select “Typical” and click [Next>]


1.3   Give it Name, for example: “Windows 2008 R2”, and click [Next>]

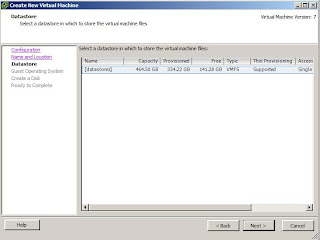
1.4   Select the [Datastore], where you want your VM to be installed, and click [Next>]


Note: You can see I have a single [Datastore]

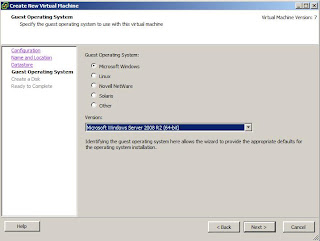
1.5 Chose which template you need, click on [Next>]

Note: by default Vmware has pre-selected “Microsoft Windows 2008 R2 (64-bit)” This is what we are installing.

1.6 Size the disk for your VM, I am going to give my VM 80GB disk and click [Next>]


1.7 Tick the box “Edit the virtual machine settings before completion” and click [Continue]


1.8 Give as much memory as you need to your Windows 2008 VM


Note: I am only going to give it a 4GB.
 
1.9 Click on [Options], then on “Boot Options”, add 15 seconds to “Power On Boot Delay”, tick the box “Force BIOS Setup” and click [Finish]


1.10 Once your VM is crated, right click on it and click on “Power”à “Power On


Note: Once your machine has been powered on, it will display the BIOS screen.
You need to select the “Boot” option and make the CDROM the first boot option.


1.11 At the top of your screen, just below the menu, click on the “CDROM” icon


1.12 Click on “Connect to ISO image on local disk…”


1.13 Select the Windows 2008 R2 ISO image and click [Open]
 

1.14 Go back to the BIOS scree, press <F10>


1.15 You will see the screen below, just hit [ENTER]


1.16 Your Virtual Machine will boot off the Windows 2008 R2 ISO, see below


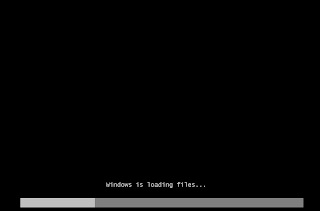
1.17 The Windows installation will begin see the screen “Start Windows
 
1.18 Choose the Language. I am in UK, so I chose “English (United Kingdom)”


1.19 Click on [Install Now]


1.20 Chose which version of Windows 2008 R2 you want to install and click [Next]
 
1.21 Accept the License terms and click [Next]


1.22 Select “Custom (Advanced)”


1.23 Click on [Next]


1.24 Windows will start copying files to your Virtual Machine


1.25. Note: Once Windows finishes copying files, it will reboot your VM a couple of times
 
1.26 Once Windows has finished the installation, it will prompt you to change the Administrator’s password. Click [OK]


1.27 Choose a new Password and click on the Blue Arrow


1.28 Click on [OK]


Your Windows 2008 VM will be logged on as Administrator and your installation is complete.
Depending on how you will use your new Windows 2008 server, there are many things you need to do to get it fully setup.
Here is a short list
1.       Set a name
2.       Set an IP
3.       Join it to a domain, if you required
 I hope you enjoyed. I will be covering a Linux installation (Redhat) later.
By Renato de Oliveira